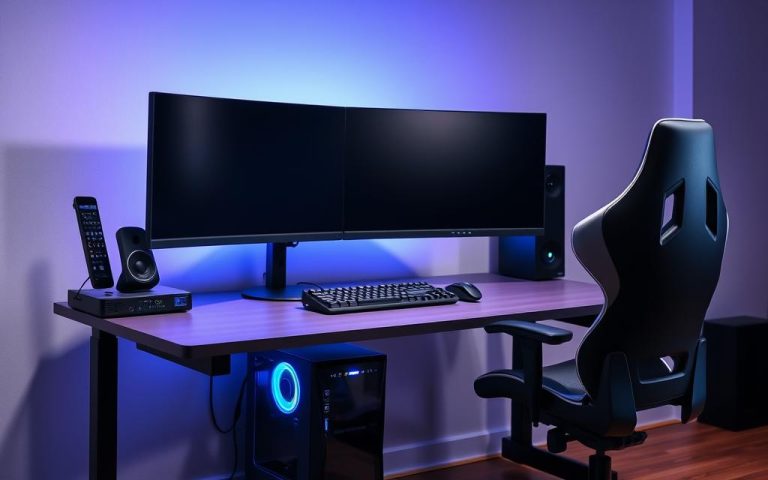

Boost Your Windows 8 PC for Smoother Gaming
Older computers can still deliver great gaming experiences with the right tweaks. Instead of costly hardware upgrades, focus on software optimization to maximize efficiency. Many settings impact responsiveness, from background processes to visual effects.
Microsoft offers free tools to help manage startup programs and system resources. Their performance guide explains how unnecessary apps drain power. Running multiple antivirus programs can also create instability.
Looking at boost windows smoother alongside find make gaming friends gives a clearer view of the wider topic.
Balancing graphics quality with performance is key. Lower resolutions and adjusted settings often yield smoother frame rates. With these changes, your system can handle modern games better without upgrades.
How to Boost PC Gaming Performance Windows 8
Hidden settings in Windows 8 can dramatically improve responsiveness. Focus on managing background tasks and power allocation to prioritize gameplay. Small adjustments often yield significant gains.
Prioritize Game Mode and Background Processes
Enable Game Mode via Settings > Gaming > Game Mode toggle. This reduces non-essential processes, dedicating resources to your game. Follow these steps:
- Open Settings and navigate to the Gaming section.
- Toggle Game Mode to “On.”
- Restart your device for changes to take effect.
Use Task Manager to identify high-impact programs. Press Ctrl+Shift+Esc, then sort by CPU or memory usage. Close unnecessary apps before launching games.
Adjust Power Settings for Maximum Performance
Windows 8 throttles CPU speed to save energy. Switch to the “High performance” plan to prevent this. Here’s a comparison of power plans:
Related Posts:


| Power Plan | CPU Throttling | Best For |
|---|---|---|
| Balanced | Moderate | Everyday use |
| Power Saver | Aggressive | Battery life |
| High Performance | Disabled | Gaming |
Avoid running multiple antivirus tools. Conflicting programs can reduce FPS by hogging resources. Stick to one trusted solution.
Optimize System Settings for Gaming
Fine-tuning essential configurations enhances overall responsiveness. Focus on startup programs, visual effects, and disk maintenance to free up resources. These changes ensure your system prioritizes gameplay over background tasks.

Disable Unnecessary Startup Programs
Too many apps launching at boot slows down your system. Use Task Manager (Ctrl+Shift+Esc) to manage startup items:
- Open the Startup tab and sort by “High impact.”
- Right-click non-essential apps (e.g., updaters) and select Disable.
- Restart to apply changes.
Turn Off Visual Effects for Faster Rendering
Windows Aero animations consume GPU power. Disabling them can improve FPS by up to 15%:
| Visual Effect | Performance Impact | Recommended Setting |
|---|---|---|
| Animations | High | Off |
| Transparency | Medium | Off |
| Shadows | Low | Optional |
Clean Up Disk Errors and Fragmentation
Run Check Disk (chkdsk) to fix corrupted files. For disk optimization:
- Search for “Defragment and Optimize Drives” in Start.
- Select your drive and click Optimize.
- Schedule weekly maintenance via Task Scheduler.
NTFS drives benefit more from defragmentation than FAT32. Case studies show load times drop by 20% after optimization.
Update and Maintain Hardware Drivers
Nvidia reports 23% FPS gains from driver optimizations. Outdated versions bottleneck hardware, causing stutters and crashes. Prioritizing regular updates ensures compatibility and unlocks performance.
Graphics Card Drivers: AMD vs. Nvidia
Manufacturers release updates monthly. Beta versions offer new features but lack stability. WHQL-certified options are tested for reliability:
| Brand | Update Frequency | Recommended Version |
|---|---|---|
| Nvidia | Monthly | Game Ready (WHQL) |
| AMD | Bi-monthly | Adrenalin (WHQL) |
Safe Update Practices
Always create a system restore point before installing:
- Search “Create restore point” in Start.
- Click Configure → Create.
- Name it (e.g., “Pre-driver update”).
Use Device Manager to roll back faulty drivers. Right-click the device → Properties → Driver tab → Roll Back.
Warning: OEM-modified drivers (e.g., from Dell or HP) may conflict. Download directly from AMD/Nvidia for optimal results.
Free Up System Resources
Unused apps and temporary files silently drain your computer’s potential. Over time, these resources accumulate, slowing down your system. A few targeted fixes can reclaim space and speed.

Remove Bloatware and Unused Applications
OEMs often pre-install unnecessary programs. Tools like AVG TuneUp reduce background processes by 37%, according to case studies. Start by auditing your apps:
- Open Settings > Apps > Apps & Features.
- Sort by install date to identify bloatware.
- Uninstall rarely used software (e.g., trial antivirus).
“Regular maintenance prevents system decay. Focus on apps you actively use.”
Use Disk Cleanup for Temporary Files
Windows’ built-in tool clears cached data and log files. For deeper cleaning, third-party options like CCleaner offer more control:
| Tool | Features | Best For |
|---|---|---|
| Disk Cleanup | Basic temp files | Quick fixes |
| CCleaner | Registry cleaning | Advanced users |
Clear browser caches monthly. Tests show this recovers up to 1GB of space. Avoid deleting system-protected files—they’re critical for stability.
Leverage ReadyBoost for Faster Load Times
Microsoft’s ReadyBoost feature turns external storage into a performance booster. By caching frequently accessed data, it improves memory management and reduces load times. This works especially well on older machines with limited RAM.

ReadyBoost uses USB 3.0 flash drives or SD cards as secondary cache. Tests show data access can be 20x faster than traditional hard drives. For best results, use a drive with at least 2.5 MB/s read speed.
“Dedicating 1.5x your RAM size to ReadyBoost maximizes gains.”
Follow these steps to set it up:
- Insert a compatible USB drive (USB 2.0+ recommended).
- Right-click the drive in File Explorer and select Properties.
- Navigate to the ReadyBoost tab and allocate space.
Avoid low-quality storage devices. They may trigger error codes like 0x00000107. For troubleshooting, reformat the drive to NTFS and ensure it meets Microsoft’s speed requirements.
Fine-Tune In-Game Video Settings
Adjusting visual configurations can significantly enhance responsiveness. Many modern titles offer detailed customization options for balancing quality and speed. Small tweaks often lead to smoother gameplay without sacrificing much detail.

Lower Resolution and Graphical Details
Reducing resolution lightens the load on your hardware. For 1366×768 displays, try scaling down to 1280×720 for better frame rates. Here’s how different settings impact performance:
| Setting | Performance Gain | Visual Trade-off |
|---|---|---|
| Shadows (Low) | +18% FPS | Softer edges |
| Textures (Medium) | +12% FPS | Less detail |
| Anti-Aliasing (Off) | +25% FPS | Jagged edges |
Nvidia Control Panel helps optimize DirectX 11 games. Create game-specific profiles to automatically adjust:
- Texture filtering quality
- Shader cache size
- Maximum pre-rendered frames
Disable VSync and Motion Blur
VSync caps frame rates to match your monitor’s refresh rate. While it prevents tearing, it increases input lag. Benchmark tests show disabling it reduces latency by 30ms.
Motion blur effects consume extra GPU cycles. Most competitive players turn them off for clearer visuals during fast movements. Consider these post-processing impacts:
- Depth of Field: 8-10% GPU load
- Bloom Lighting: 5-7% GPU load
- Screen Space Reflections: 12-15% GPU load
“Disabling unnecessary effects reclaims hardware resources for critical rendering tasks.”
AMD Catalyst Control Center offers similar optimization tools. Use its automatic tuning feature for quick display adjustments based on your system capabilities.
Optimize Network Performance
Stable internet connectivity is crucial for seamless gameplay. Hidden network throttling settings in Windows 8 can unintentionally limit your speed. Prioritizing gaming traffic and minimizing interference ensures smoother online sessions.
Boost Wi-Fi Signal Strength
Interference from neighboring networks slows down your connection. Tools like inSSIDer analyze Wi-Fi channels and recommend the least congested option:
- Download inSSIDer and scan your area.
- Switch to channels 1, 6, or 11 (2.4GHz) for minimal overlap.
- For 5GHz bands, use channels 36–48 or 149–165.
Ethernet reduces latency by 30% compared to wireless. If possible, connect directly for competitive play.
Disable Bandwidth-Heavy Background Apps
Steam updates and cloud syncs consume significant resources. Use Quality of Service (QoS) to prioritize gaming traffic:
- Open Group Policy Editor (
gpedit.msc). - Navigate to Computer Configuration > QoS Packet Scheduler.
- Set DSCP value to 46 for gaming packets.
“TCP receive window autotuning improves throughput by 15% for high-latency connections.”
Close apps like Dropbox or OneDrive during gameplay. Their sync processes compete for bandwidth, causing lag spikes.
Adjust Mouse and Controller Settings
Precise input controls make a noticeable difference in competitive gameplay. Optimizing your hardware configurations reduces lag and improves accuracy. Small tweaks can transform your experience.
- Search “Mouse” in Start and open Pointer Options
- Uncheck Enhance pointer precision
- Apply changes and test in-game
Match DPI to your game genre for optimal control:
| Genre | Recommended DPI | Reason |
|---|---|---|
| FPS | 400-800 | Pixel-perfect shots |
| MOBA | 1000-1600 | Quick map navigation |
| RTS | 2000+ | Rapid unit selection |
Controller users should calibrate deadzones. This eliminates stick drift while maintaining responsiveness. Most games include built-in tools for adjustment.
“Pro players reduce input latency by 15ms through proper deadzone configuration.”
Update peripheral drivers through manufacturer programs like Razer Synapse. These tools unlock advanced settings for polling rates and button mapping. Avoid generic Windows drivers for best results.
Legacy game ports may require compatibility mode. Right-click the shortcut, select Properties, then choose Windows 7 mode if inputs aren’t registering correctly.
Monitor and Benchmark Your Improvements
Benchmarking reveals which tweaks deliver the best results. Use tools like MSI Afterburner or 3DMark to quantify changes. Data-driven adjustments ensure sustainable gains.
Use an FPS Counter to Track Gains
RivaTuner Statistics Server pairs with MSI Afterburner for real-time monitoring. Key metrics to watch:
- Frame time variance: Spikes indicate stuttering.
- Average FPS: Measures overall smoothness.
- 1% lows: Highlights worst-case performance.
FRAPS and PresentMon log data for deeper analysis. Compare logs before/after changes to isolate effective tweaks.
Test Different Configurations
EVGA Precision X1 automates task testing. Create profiles for each setting combination:
- Baseline: Default settings.
- Optimized: Adjusted visuals and power.
- Extreme: Minimal settings for max FPS.
| Tool | Best For | DirectX Support |
|---|---|---|
| 3DMark | Overall scores | 8–12 |
| Unigine Heaven | GPU stress tests | 9–11 |
| UserBenchmark | Hardware comparisons | All versions |
“Community databases like PassMark provide reference points for hardware tiers.”
This way, you avoid guesswork. Focus on changes that matter most for your system.
Conclusion
Optimizing your computer involves both software tweaks and smart hardware choices. Focus on driver updates, background task management, and visual settings for the best results.
Regular maintenance keeps your system running smoothly. Schedule monthly cleanups and driver checks. Small efforts prevent major slowdowns over time.
Balancing performance upgrades is key. Software adjustments often match hardware gains. Test changes with benchmarks to track improvements.
Share your results with the community. Comparing notes helps everyone refine their setups. A well-tuned machine delivers better experiences.
FAQ
Does Windows 8 have a built-in game mode?
No, Windows 8 lacks a dedicated game mode. However, manually adjusting power settings and disabling background tasks can enhance performance.
Can ReadyBoost improve gaming speed?
ReadyBoost uses USB drives as extra memory, which may help reduce load times on systems with limited RAM.
Should I disable visual effects for better FPS?
Yes. Turning off animations and transparency in System Properties frees up GPU resources for smoother gameplay.
How often should I update graphics drivers?
Check for NVIDIA or AMD driver updates monthly. New releases often include optimizations for popular games.
Does disk defragmentation help gaming performance?
Defragmenting HDDs organizes files for faster access. Use the Optimize Drives tool weekly for best results.
Will lowering in-game resolution boost FPS?
Absolutely. Reducing resolution decreases GPU workload, significantly improving frame rates on older hardware.
How do I stop background apps from slowing games?
Open Task Manager, navigate to the Startup tab, and disable non-essential applications.
Can network tweaks reduce online gaming lag?
Prioritize gaming traffic in router settings and close bandwidth-heavy apps like streaming services during play.
Is overclocking safe for gaming PCs?
Moderate overclocking can improve performance but requires careful temperature monitoring to avoid hardware damage.
What’s the quickest way to check FPS improvements?
Use built-in game counters or third-party tools like FRAPS to compare frame rates before and after optimizations.